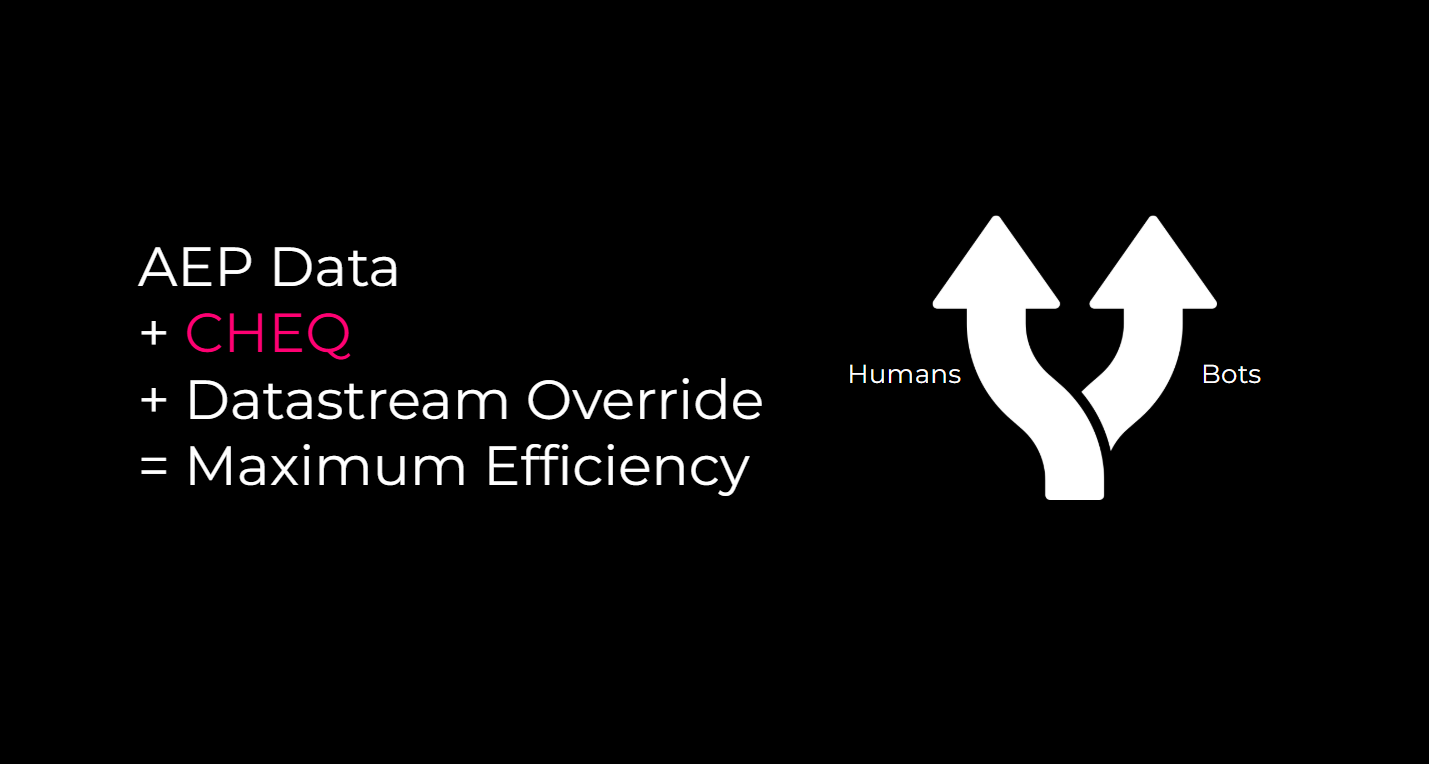
Been a little while since my last post – I’ve been busy. That’s all the excuse you’ll get. We’re building some pretty incredible stuff at CHEQ and I wanted to talk about practical application of our technology with AEP – specifically, Datastream Override. As an Adobe client, you might want to get all of the feature horsepower of Profile data – but there’s a cost associated with that. Enabling web and mobile Datasets for Profile can be prohibitive for leaner analytics departments… especially when bot traffic significantly inflates your data volume. You can’t tell me that Profiles of non-human traffic is worth it – it’s distracting, it’s expensive, and it’s sloppy. Not everyone has crazy bot problems (at least that’s what you keep telling yourself); but for those who do, I want to share how I’ve leveraged CHEQ to ensure I have high fidelity Profiles without the saturation of bot traffic.
Keep in mind – the “bot problem” isn’t exclusive to Adobe. It’s something clients experience with every data collection platform. I’d love to do a write-up for others, but I’m sticking with what I know here and AEP has all of the tools ready to solve for it.
The goal of this post is to show you how to create a Profile dataset that ONLY includes human traffic without completely suppressing that traffic.
Table of Contents
Datastream Overrides
If you’re not familiar, Datastream Overrides allow you to send redirect data into a secondary dataset instead of your Primary dataset. Let’s first lay out the steps to achieve our goal. We need to do a few things:
- Create a Dataset for the yucky traffic
- Add the new Dataset to your Datastream
- Create a Data Element with CHEQ’s verdict
- Create a Data Element to swap Dataset IDs
- Add the Data Element to the Web SDK Extension
- (Optional) Add the “Yucky” Dataset to your CJA Connection
That’s it. Seriously. 5.5 steps – and honestly each one takes less than 30 seconds. Let’s do this one step at a time. I’m assuming you’re using CHEQ in this post – but if you’re forced to use something else (clearly against your will…), this logic will work with other tools, too.
Create a Dataset for the Yucky Traffic
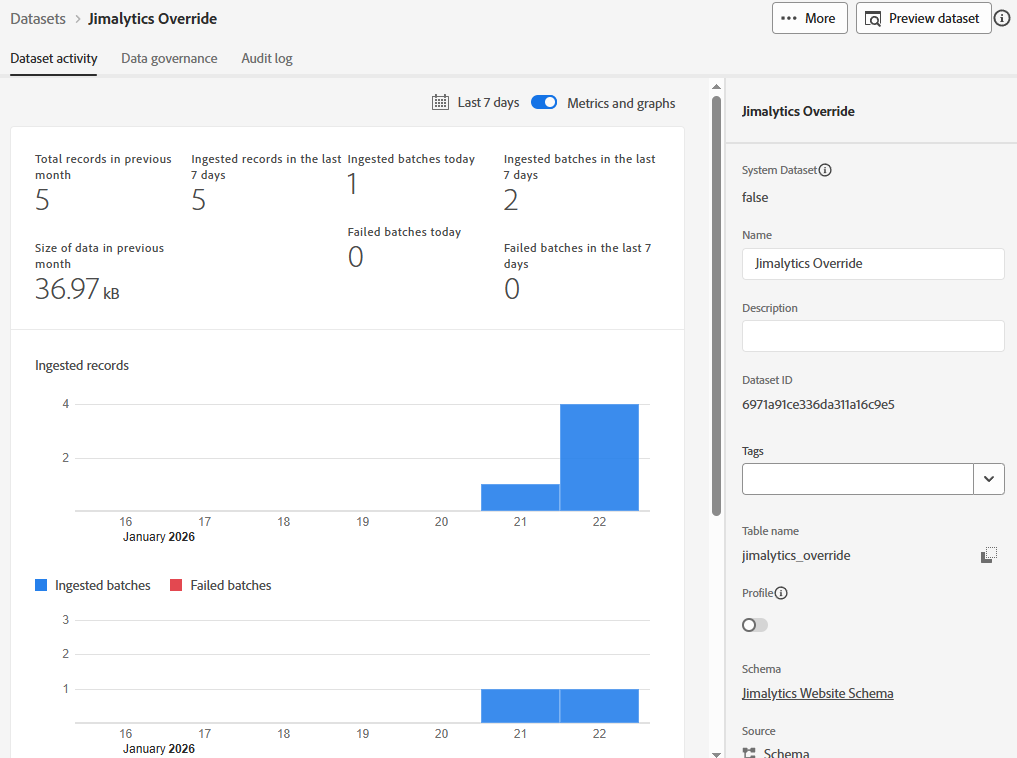
“Yucky Traffic” is a technical term. Today, we’re using it to describe malicious bots. Go through your usual Dataset creation workflow. Fortunately, we are just going to use the Schema built for our regular Website data. Make sure you haven’t checked the “Profile” box. We don’t want to store these filthy server calls. Just to be nice, I called the Dataset “Jimalytics Override”. If you want to get snarky, you can call this the “Landfill” just so you are self-aware if you decide to add this data back to your CJA Data View.
Here’s what my Dataset looks like:
Congrats. If you’ve had a long day, you can now take a 2 hour lunch and send “Whew, finally got around to creating the Dataset” when you’re back. People will definitely add a confetti emoji. Give it a shot and tell me how it goes.
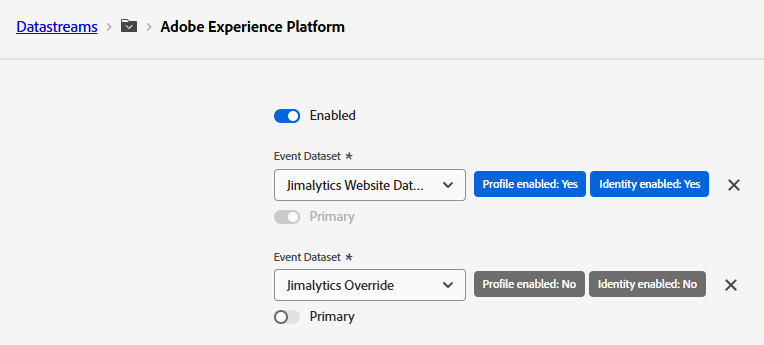
Add the new Dataset to your Datastream
It’s now time to add this new Dataset to your Datastream. Honestly, we could have combined this with Step 1 because it’s so freaking simple – but let’s continue with the charade that this stuff is super complicated. Navigate to your website’s Datastream. Click on it. Now click the 3 dots next to Adobe Experience Platform and click Edit. Then click Add Event Dataset and select the Override Dataset you just created.
Here’s what that looks like in the interface:
All set! I think it’s time for another break and Slack message – try something like “Added the Dataset to the Datastream. Will work for the rest of the day integrating it into Adobe Launch.” That should buy you time to take a power nap. You earned it.
Create a Data Element with CHEQ’s verdict
Hope you got some rest. Let’s go into Adobe Data Collection Tags (Launch) and create our Data Elements. If you’re already a CHEQ client or you’re on a trial – you probably already have us integrated into your data layer. Let’s assume you do. We integrate into your EDDL, CEDDL, Local Storage, or you can even set our values in a Cookie (why). Usually I use the ACDL – but for my website I used Local Storage… because I felt like it. If you are pushing CHEQ data into your EDDL or anything subject to a race condition, I recommend storing the Data Element on the Visitor scope. Here’s what that Data Element looks like:
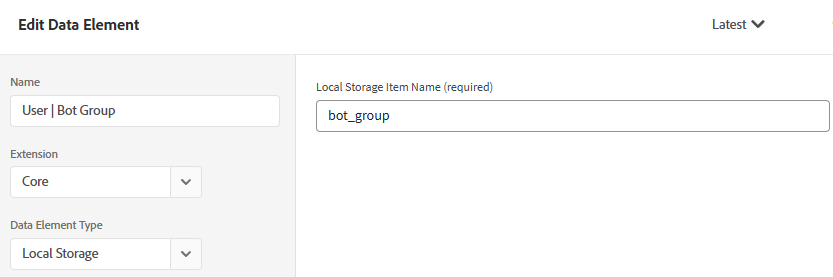
I named it bot_group. Not like we force you to name it anything specific. The possible values for this item are: valid, suspicious, malicious, bots, and good bots. Here’s other stuff you can add to the data layer if this isn’t enough. Whatever. You get the idea. We want to block malicious bots – so we need this. Moving on.
Create a Data Element to swap Dataset IDs
We now need to create an IF statement that determines the Dataset ID. What’s a Dataset ID? Well, if you scroll up and look at the image of the Dataset we created in Step 1, it’s on the right-hand pane. Just copy that ID and store it for later. You also need your Primary Dataset ID. Store that one, too. You’re going to create a Conditional Value Data Element to swap these out whenever our User | Bot Group Data Element is malicious. It will look something like this:
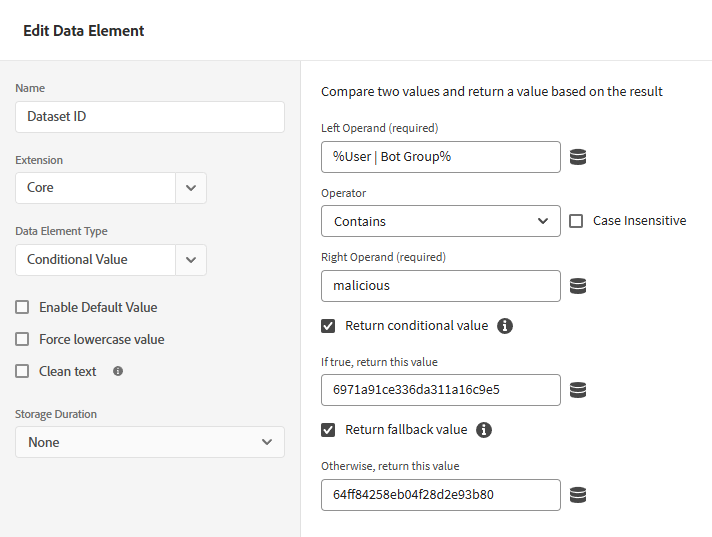
So we’re saying “If the traffic is malicious, send it to the first Dataset… otherwise, send it to our Primary Dataset.”
Add the Data Element to the Web SDK Extension
This is where the magic happens. We’re going to Enable the Datastream Override functionality for Web SDK. Head to your Web SDK Extension Config page and scroll all the way to the bottom. Here’s what that should look like – and ensure you configure it for each relevant environment:
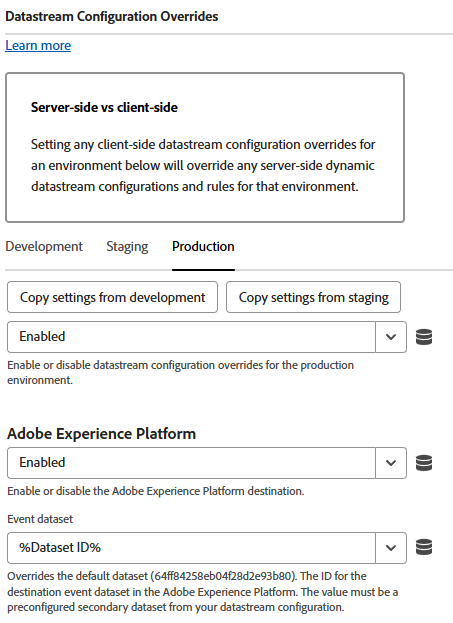
Done. Add to library, build, and test. This will override the Dataset for every server call where the bot_group parameter = malicious. Super convenient.
Other stuff you might want to do
Add Yucky stuff back into CJA
So this was easy enough – but you might want your CJA reports to look like there’s complete continuity (like you just don’t want it to look like a lot of data “disappeared”)… because explaining this stuff takes work and who wants to do that? I get it. Trust me. Anyway, the data being ingested is literally the same format in both Datasets. You can quite easily add the Dataset into your Connection. Here’s what it looks like:

You’re going to use the same Person ID for each one – just so it knows where to join data. When you pull data, it should look like nothing happened.
Make sure it works
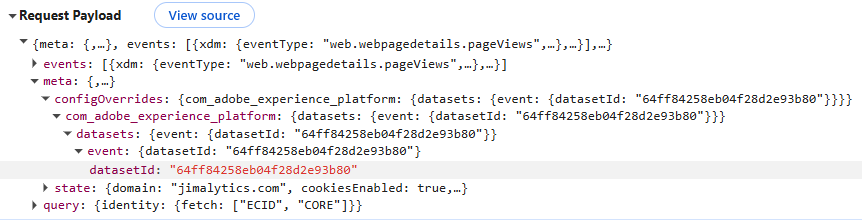
QA is important – just to make sure you didn’t accidentally swap the Dataset IDs in the Conditional Data Element. The parameter we’re looking for is this:
configOverrides.com_adobe_experience_platform.datasets.event.datasetId
When you QA your Web SDK server calls, you’re going to find the datasetId override in the payload here:
If you’re using CHEQ, you can trigger the malicious classification by spoofing your browser as another device via Chrome DevTools and refreshing the page (may need to refresh twice in some cases).
Consider race conditions for the first server call
Okay, so I’ll be addressing this last thing in another post – but CHEQ uses behavioral signals on top of stuff like hardware to classify traffic as human vs. non-human. Usually we can return a verdict within a fraction of a second, but sometimes it takes longer and we’re unable to deliver it before the AEP pageview is deployed. That means that the first server call will land into the Profile Dataset. Not optimal.
To keep this from happening, we recommend ensuring you set your load order so CHEQ loads in the header… but there’s also another way. If you’re conscious about your Profile or server call volume, you can trigger your first pageview on the CHEQ classification event. We’re baking this into an Extension that we’re hoping will be released publicly in the Launch catalog soon. If you’re struggling with it today, though – leave a comment or reach out to me on LinkedIn or Measure Slack. I’m always eager to help out.
Final Thoughts
For those who do not use Adobe Launch and manually implement the alloy code – here’s the Datastream Override documentation. This post originally included an option to use Data Distiller… but that seemed pretty overkill and would likely increase cost for this use case. However, if you want to pull out historical data, this might be a tempting option. CHEQ also plugs directly into AEP via cloud storage connector. For those who are comfortable with that, I recommend just importing the data from Azure, S3, or whatever cloud storage source your company uses. That flexibility is what AEP was built for.
It’s been a while since I’ve posted. I’ve been pretty heads-down focusing on changing how our clients think about and use our product. We’re finally getting to a point where our super exciting stuff is coalescing into much, much bigger stuff. I’m pretty excited to post more updates in the near future… especially as Summit approaches. Hope all of my readers are doing well!